

PDF EXPORT GUIDES
QuarkXPress
Creating a print-ready PDF from QuarkXPress: exporting PostScript, then converting with Acrobat Distiller, step by step.
Steps to create the PDF
Export a PostScript file from QuarkXPress’ print dialog, then convert it to PDF using Acrobat Distiller.
- 01
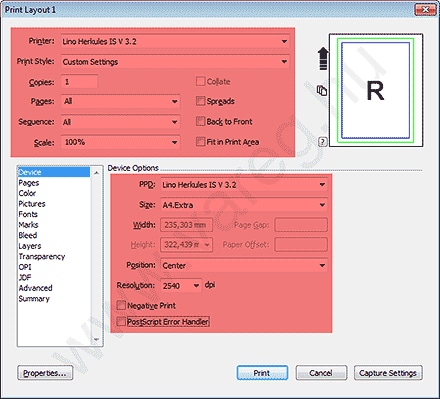
Device
Set the parts marked in red to match the screenshot; the "Printer"/"PPD" in the example below is Lino Herkules — it’s worth installing this PostScript printer driver on your machine (PostScript files created with this driver rarely cause problems), but others work too (e.g. ECRM Mako). "Size" is set to "A4.Extra" in the example, since we’re writing the PS from an A4-sized document; choosing "Custom" in this field lets you enter a custom size (make it large enough to fit the bleed and crop marks!).
- 02
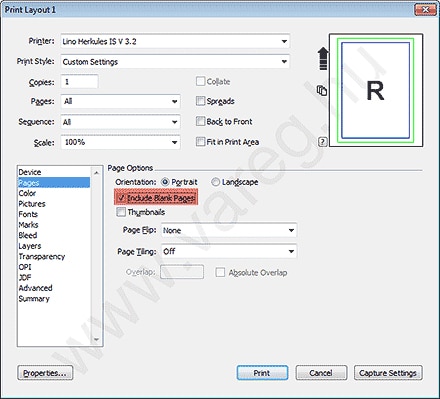
Pages
Enable the "Include Blank Pages" option (so completely blank pages — which can occur e.g. in a book — aren’t left out of the PS).
- 03
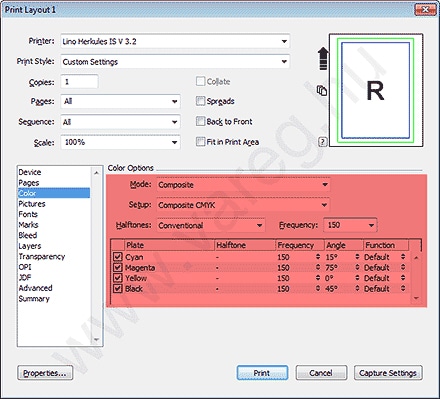
Color
Set the parts marked in red per the example below; if your material also contains spot colors and you genuinely want to print them as spot colors, choose the "Composite CMYK and Spot" option.
- 04
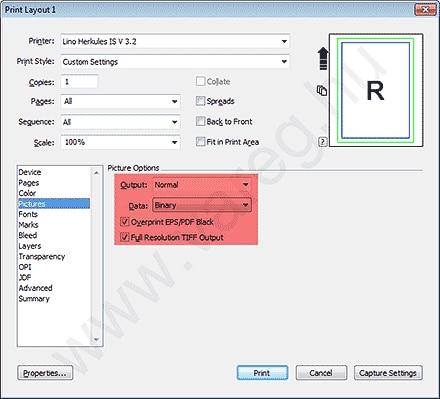
Color
Set the parts marked in red per the example below.
- 05
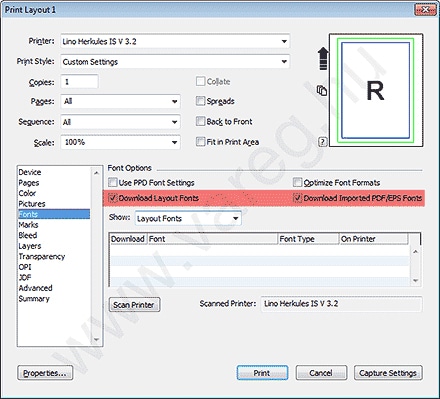
Fonts
Set the parts marked in red to match the screenshot.
- 06
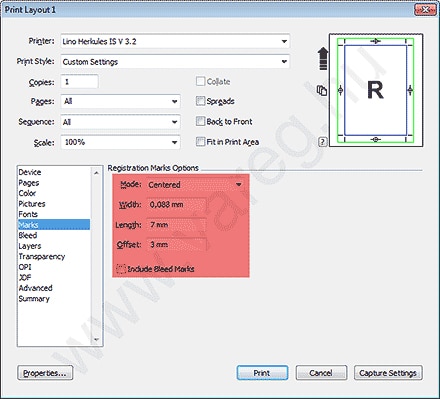
Marks
Set the parts marked in red to match the screenshot; if you use a 5 mm bleed, set "Offset" to 5 mm.
- 07
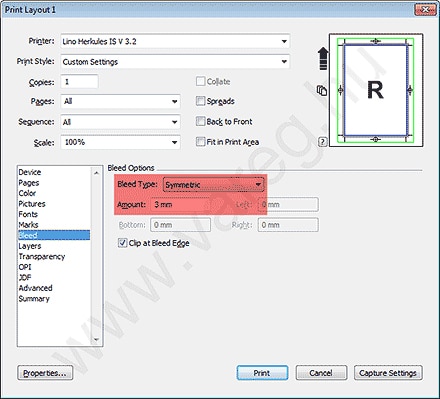
Bleed
Set the parts marked in red to match the screenshot; if you used a 5 mm bleed, set "Amount" to 5 mm!
- 08
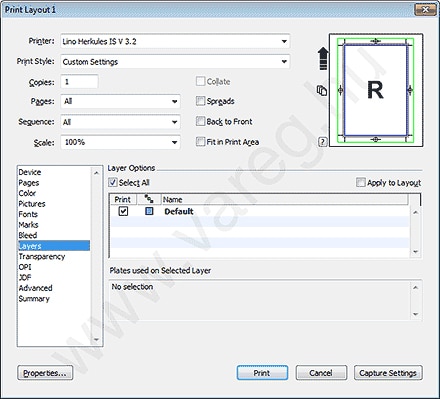
Layers
If the settings shown below already match what you see, there is nothing to change on this tab.
- 09
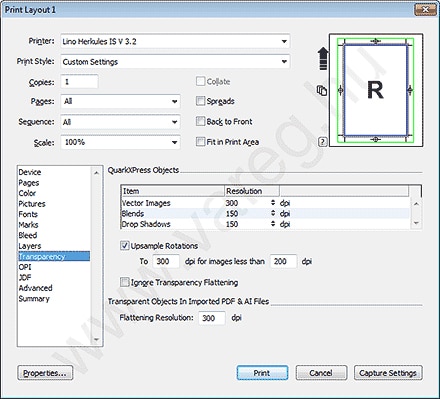
Transparency
If the settings shown below already match what you see, there is nothing to change on this tab.
- 10
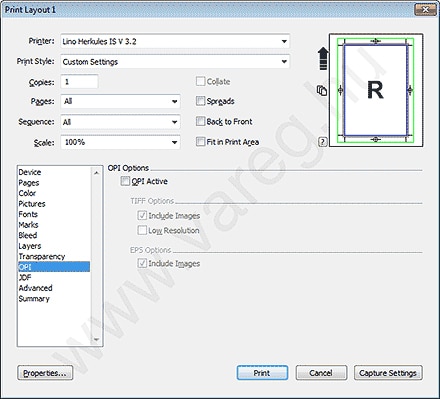
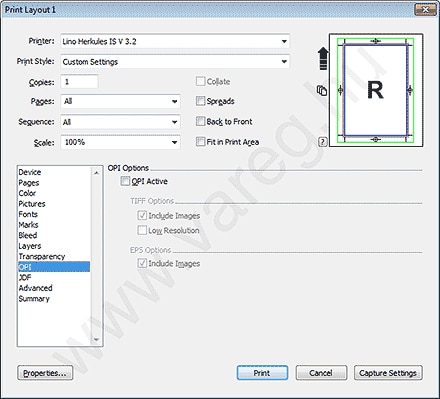
OPI
If the settings shown below already match what you see, there is nothing to change on this tab (important: "OPI Active" must NOT be checked).
- 11
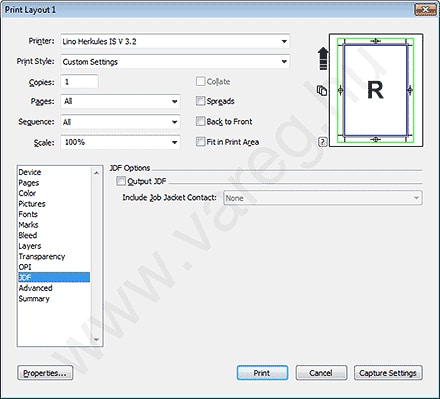
JDF
If the settings shown below already match what you see, there is nothing to change on this tab.
- 12
Advanced
Set "PostScript Level" to "Level 2".
- 13
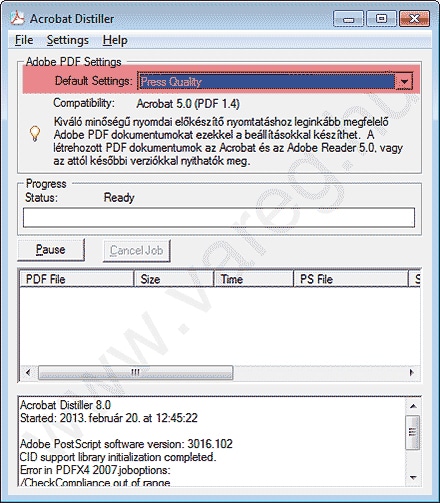
Acrobat Distiller — application window
Once you have the PS file, you can create the PDF from it using Acrobat Distiller as follows: choose the factory "Press Quality" setting.
- 14
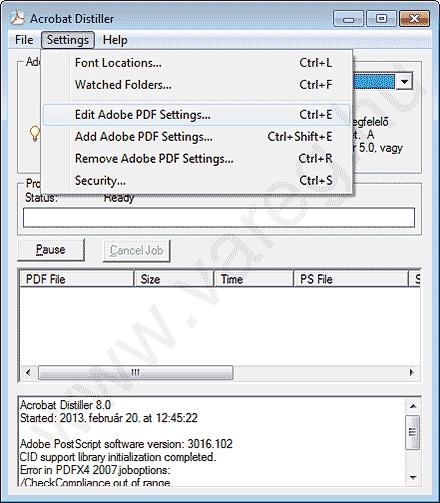
Acrobat Distiller — application window
In the "Settings" menu, click "Edit Adobe PDF Settings".
- 15
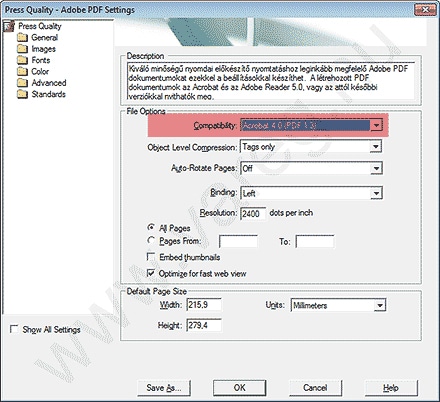
General
Set "Compatibility" to "Acrobat 4.0 (PDF 1.3)".
- 16
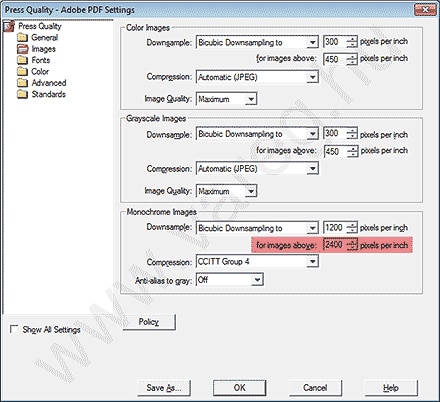
Pictures
Set the part marked in red to 2400.
- 17
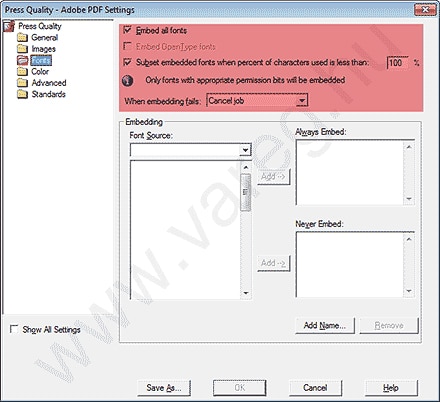
Fonts
Set the parts marked in red to match the screenshot; with these settings Distiller embeds every font used into the PDF, and if it can’t, it stops writing the PDF. If that happens, try converting the text set in that typeface to curves/outlines, or try manually adding the problem font to the "Always Embed" list.
- 18
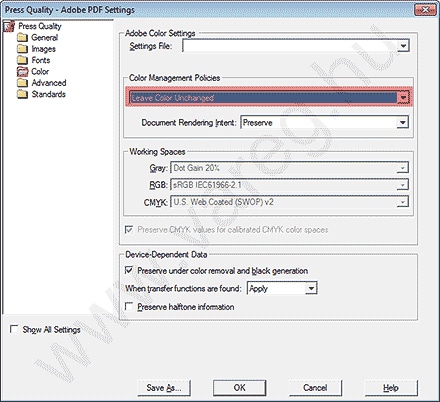
Color
Set "Color Management Policies" to "Leave Color Unchanged".
- 19
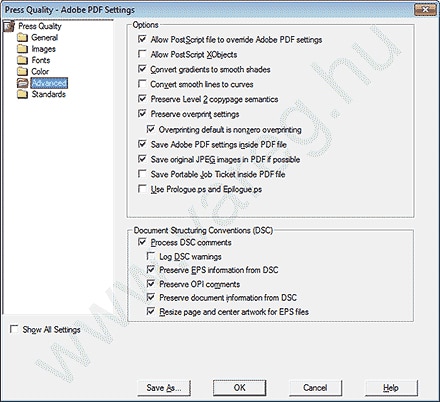
Advanced
If the settings shown below already match what you see, there is nothing to change on this tab.
- 20
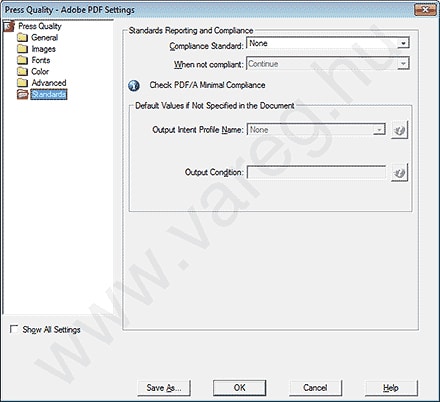
Standards
If the settings shown below already match what you see, there is nothing to change on this tab.
Questions about the export?
We help with the right settings. Response time: 24–48 hours.