

PDF EXPORT GUIDES
Adobe Photoshop
Exporting a print-ready PDF from Photoshop, step by step.
PDF export settings
No changes are needed on the "Security" or "Summary" tabs.
- 01
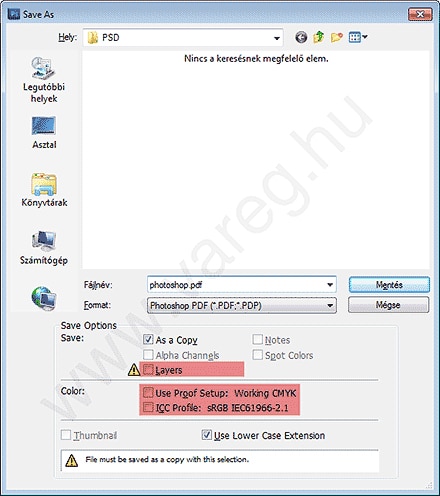
Save As
Uncheck the "Layers" checkbox (this automatically checks "As a Copy"). Uncheck the "Use Proof Setup" and "ICC Profile" checkboxes.
- 02
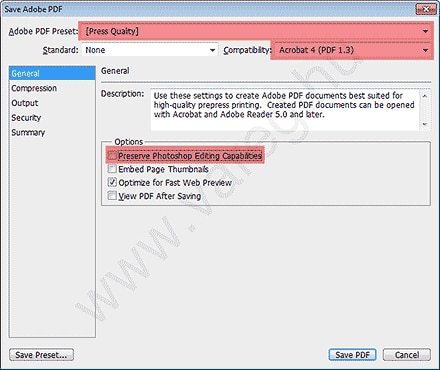
EPS Options
Set the "Adobe PDF Preset" to the factory "[Press Quality]" setting. Set "Compatibility" to "Acrobat 4 (PDF 1.3)", and uncheck "Preserve Photoshop Editing Capabilities".
- 03
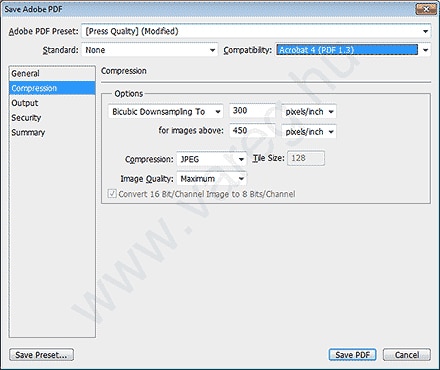
Compression
If the settings shown below already match what you see, there is nothing to change on this tab.
- 04
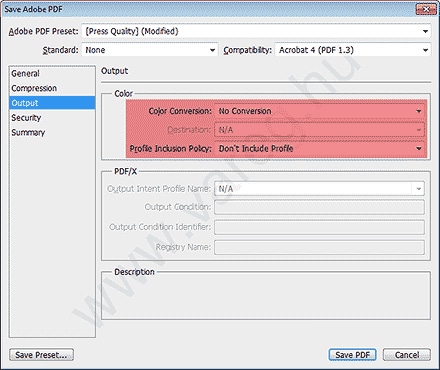
Output
Set "Color Conversion" to "No Conversion", and set "Profile Inclusion Policy" to "Do not Include Profiles".
- 05
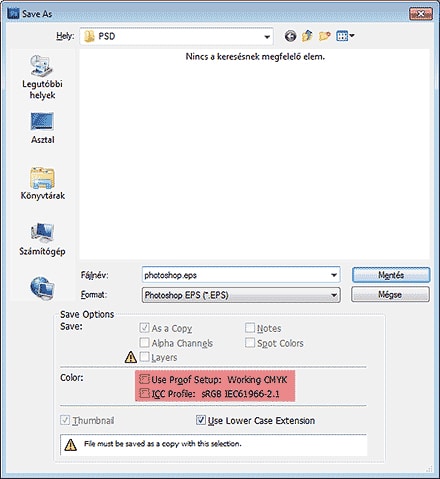
Save As (EPS)
Since crop marks and the Trim/Bleed boxes used for imposition are not included when writing a PDF directly, it is better to export an EPS from Photoshop and then import it into another application to produce the PDF or PS. When saving the EPS, choose the "Photoshop EPS (*.EPS)" format and leave the "Use Proof Setup" and "ICC Profile" checkboxes unchecked.
- 06
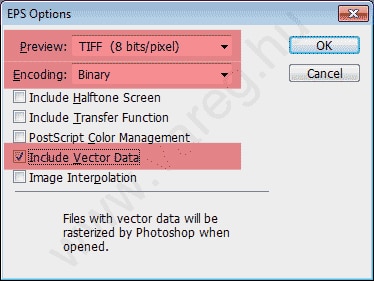
EPS Options
"Binary", and check "Include Vector Data" (only active if the document contains text or other vector layers).
Questions about the export?
We help with the right settings. Response time: 24–48 hours.